Show Images while scrolling with Intersection Observer
Published on: July 3, 2023
Back to the Blog indexSometimes you might have a requirement for a Website to make images appear while scrolling. Of course, you could accomplish this implementation with the scroll event and some math operations so you can calculate the point where you want to start showing the images.

This feature is presented as an exercise in Javascript30 course by Wes which I absolutely recommend. In that exercise, Wes uses the scroll event, debouncing, and some calculations regarding the elements’ coordinates. You can learn a lot from his implementation. However, I decided to use Intersection Observer. Feel free to review my implementation corresponding to this demo, and of course, pull requests are welcome.
Let’s see how I used Intersection Observer in this example step by step, but first, let’s understand what it is.
What is Intersection Observer?
The MDN documentation on Intersecion Observer says:
The Intersection Observer API provides a way to asynchronously observe changes in the intersection of a target element with an ancestor element or with a top-level document’s viewport.
As this API works asynchronously, we don’t run expensive operations in the main thread, avoiding bugs and other problems associated with it. We track the visibility change of an element when intersecting with an ancestor element or with the viewport (if the target element doesn’t have an ancestor). This is called the intersection root or root element. We may also define the percentage(s) at which the target element experiments a visibility change when intersecting with the root element. This is called the threshold and it could even be an array of values.
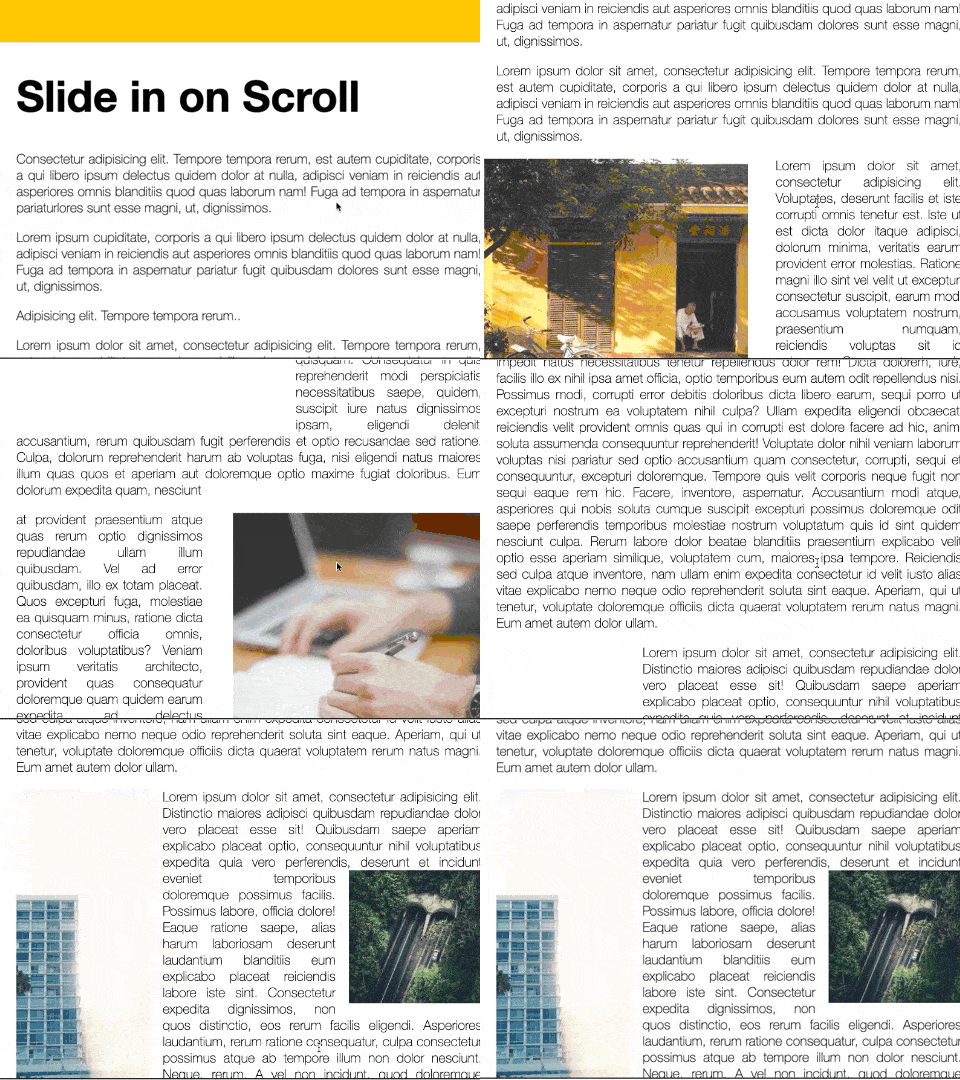
Let’s see how these Intersection Observer concepts are applied to our “slide in on scroll” example.
The HTML
The example HTML code is a set of paragraphs and interleaved images. Those images are precisely the ones we want to show and hide while we scroll the page back and forth:
<div class="site-wrap">
  <h1>Slide in on Scroll</h1>
  <p>
    Consectetur adipisicing elit. Tempore tempora rerum, est autem cupiditate,
    corporis a qui libero ipsum delectus quidem dolor at nulla, adipisci veniam
    in reiciendis aut asperiores omnis blanditiis quod quas laborum nam! Fuga ad
    tempora in aspernatur pariaturlores sunt esse magni, ut, dignissimos.
  </p>
  <!-- more paragraphs here ... -->
  <img
    src="http://unsplash.it/400/400"
    class="align-left slide-in first-image"
  />
  <!-- more paragraphs after images ... -->
  <p>
    Lorem ipsum dolor sit amet, consectetur adipisicing elit. Voluptates,
    deserunt facilis et iste corrupti omnis tenetur est. Iste ut est dicta dolor
    itaque adipisci, dolorum minima, veritatis earum provident error molestias.
    Ratione magni...
  </p>
  <!-- rest of html -->
</div>
Our intersection root is the viewport. So we should expect the Intersection Observer to watch for the target element intersection with the viewport. It’s finally time for javascript and we will start creating the intersection observer. You can see it inside the createObserver() function:
const intersectionOptions = {
  root: null,
  rootMargin: "0px",
  threshold: 0.7,
};
let observer = new IntersectionObserver(showImage, intersectionOptions);
The first argument we pass to the Intersection Observer constructor is a callback function, that will run every time the intersection occurs. We will see its implementation later. The options for this observer’s configurations are:
- root: Setting it up as null, will show the observer to watch changes against the viewport.
- rootMargin: We define offset values to add to the element root’s bounding box. In this case, we define it with no offsets
- threshold: As I told you before, this value is the percentage of the element that is visible. If the number approaches 0, it will be visible after a few pixels of the element intersecting with the viewport.
The function showImage() implements what we want to do when the target element intercepts the viewport, which is showing the previously hidden image. We add or remove a class called active. In the CSS this class sets the property; opacity:1. making the element visible when intersecting:
if (isIntersecting) {
  target.classList.add("active");
} else {
  target.classList.remove("active");
}
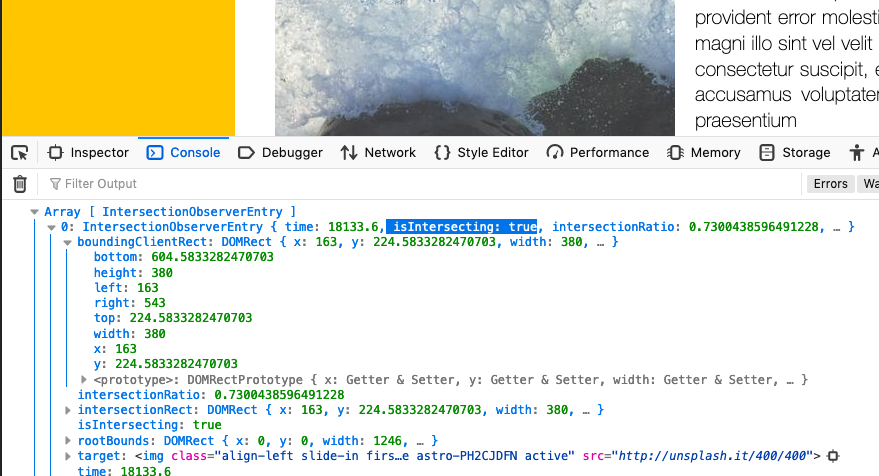
But, where does the boolean isIntersecting come from? Remember that showImage is the observer callback, and has a parameter called payload. This is an array of IntersectionObserverEntry objects containing many properties describing the behavior of the intersection. The information on whether an image is intersecting is key for any implementation like the one in our example, but there are many others we may find useful for other requirements.

The payload will be handed to us whenever the observer detects or doesn’t, an intersection between the observed images and the viewport. That’s why when isIntersecting is true, we show the image adding the active class, and when not, we remove it.
Just one more thing to pay attention to is the observed element. In this case, every image is observed and this is accomplished by the expression:
allImages.forEach((image) => {
  observer.observe(image);
});
You may notice that when showing or hiding the images, there’s a transition applied to the slide-in class making this appearance/disappearance more appealing to the human eye.
Further research and practice
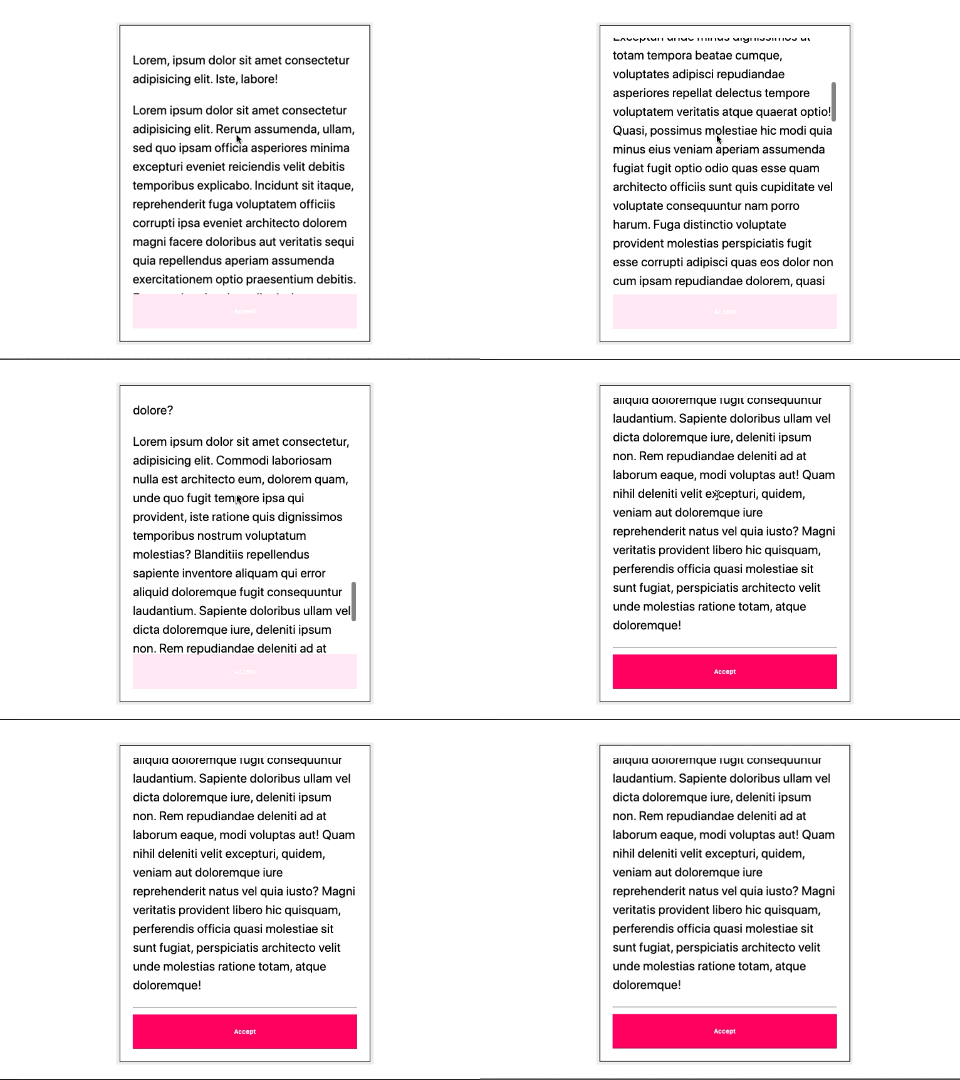
Explore what other intersecting things can be achieved using the Intersection Observer API. I have an example that uses Svelte to implement a “Scroll to Accept” feature we have seen in many Websites on policy agreements or contracts, or other similar uses.

I suggest reviewing the MDN documentation on the Interception Observer API which has some good examples you may as well want to study. Finally, don’t forget to reach out via the Github examples in this article, and my contact form. Let’s learn more about Frontend Development!